
SETOUT · HELP
How to use Setout.
Select something, pick the sides, press the button. The sizes go on the drawing. Setout measures artwork and writes the sizes onto it, reading them at the scale you are drawing at. It also gives you the length round the outside of a shape, which is the number a neon or LED quote needs. Illustrator's own Transform, Align and Pathfinder sit in the same panel, so those three windows can stay closed.
Open it from Window, then Extensions, then Setout.
Prefer paper? Download this guide as a PDF.

Your first measurement
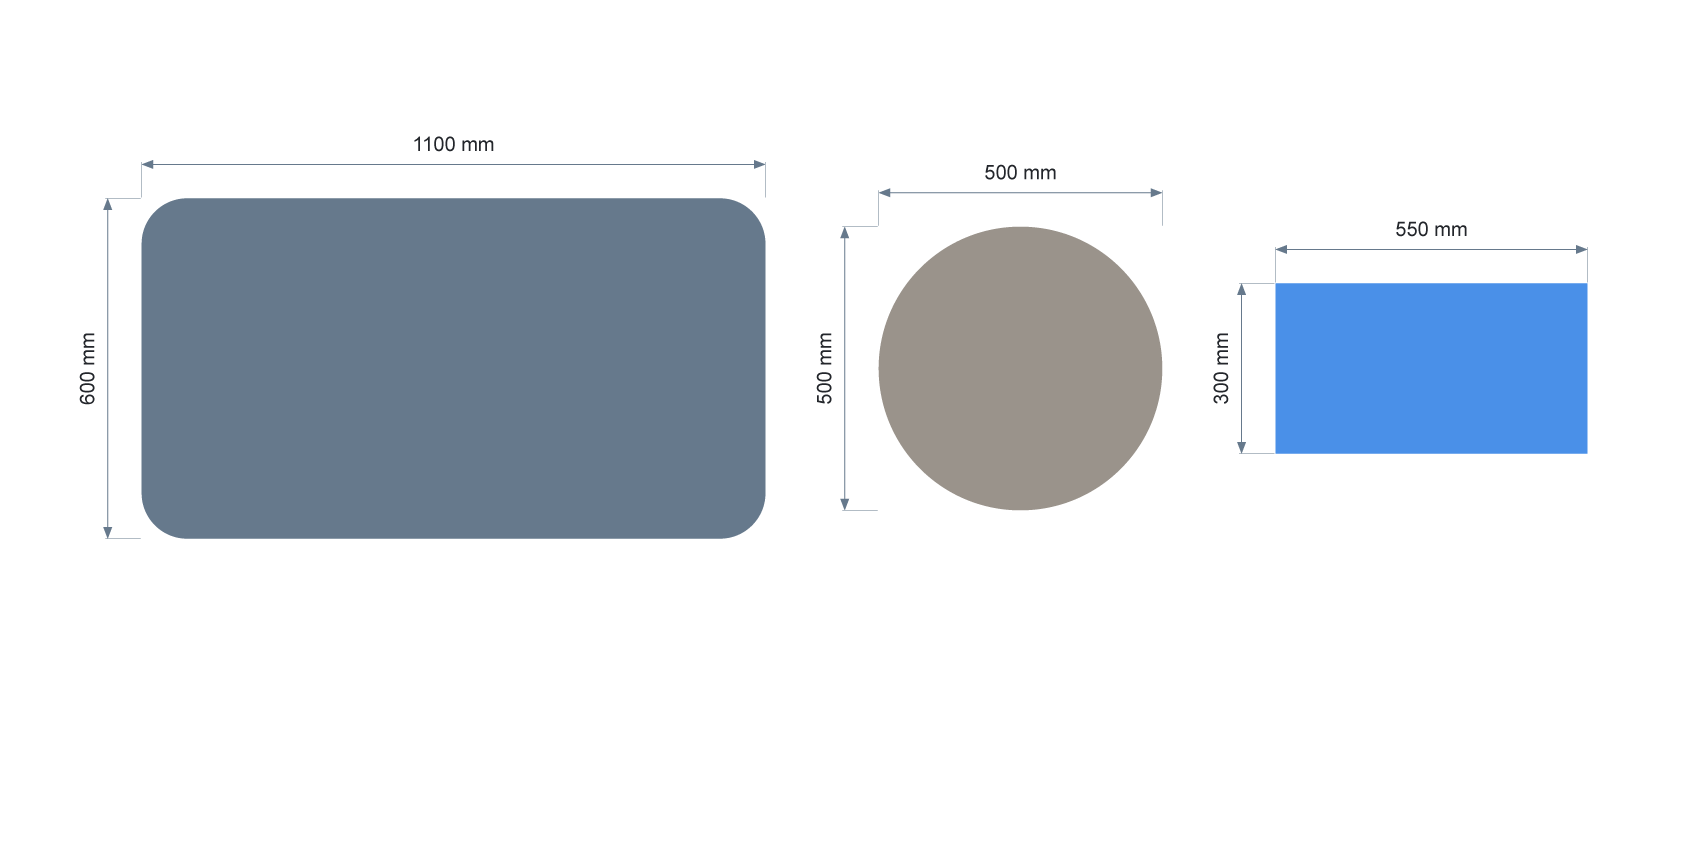
Select something, pick the sides, press the button. The sizes go on the drawing.
- Select your artwork in Illustrator.
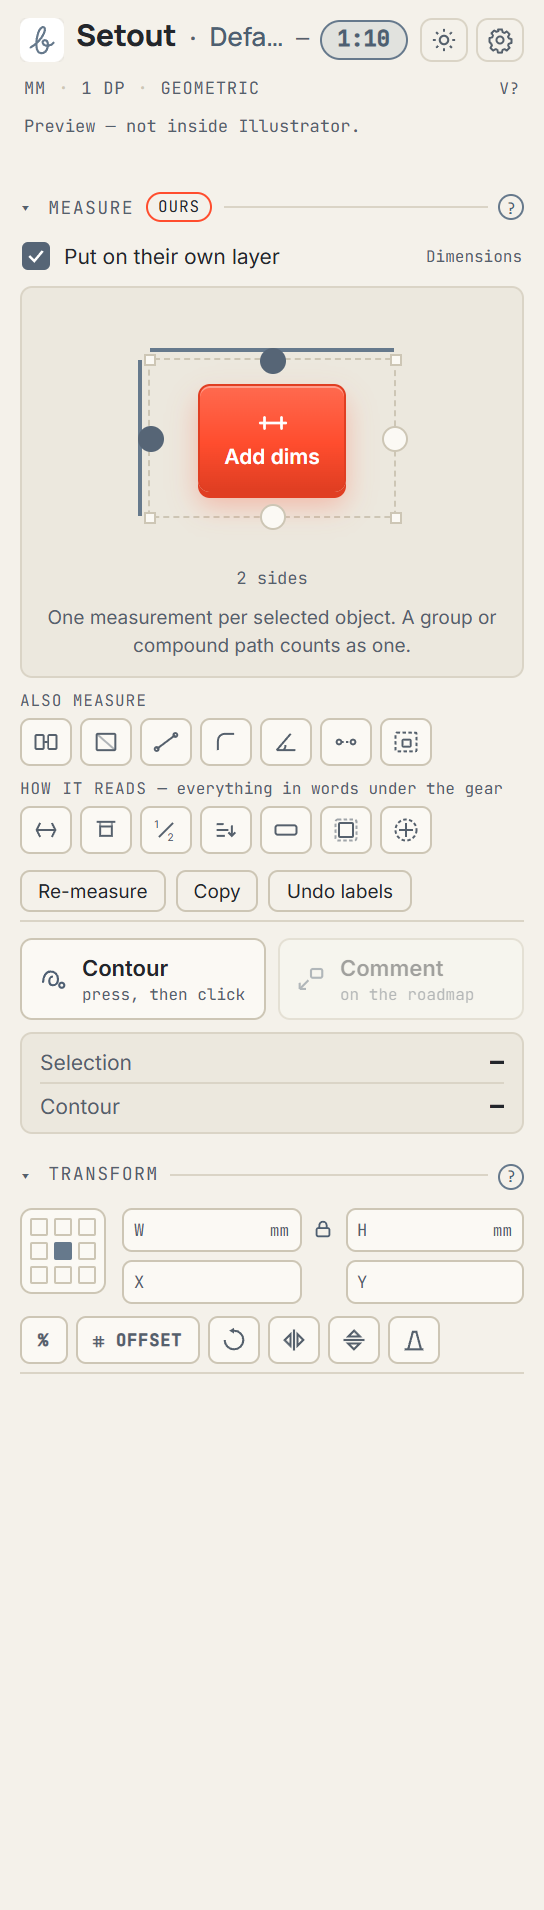
- Pick the sides you want a size on. Press the small circles on the box in the middle of the panel: top, bottom, left, right. Hover one and it names itself.
- Press Add dims. The sizes land on the drawing.
That is the whole job. Everything else in the panel changes how those numbers look, or measures something other than width and height.
One measurement per selected object. A group counts as one object. A compound path counts as one object, so a letter P gets one measurement and nothing inside its counter.
Every button, in one place
The icon on this page is the same drawing as the icon in the panel. Hover a button in the panel and it says the same words.
33 buttons, grouped the way the panel groups them. Each one's tooltip, word for word.
The working scale
The scale changes what a measurement says, never what the artwork is.
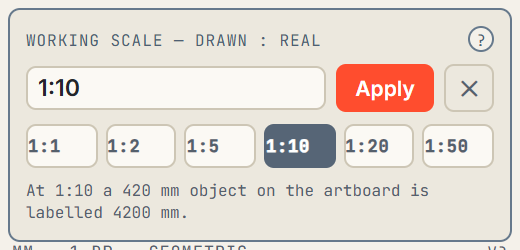
Most sign artwork is drawn small. The top bar shows the scale you are working at, 1:10 by default.
- At 1:10, a 100 mm object on the artboard is labelled 1000 mm. The object is not touched. The label reports the real sign.
- What the scale applies to: every dimension label, the contour length, area, the Copy table and the material price.
- What it never applies to: Transform, Offset and the align gap. Those move artwork, so they work in document units, exactly as Illustrator's own panels do. Type 100 into the width box and the artwork becomes 100 mm on the artboard, whatever the scale says.
That split is the same one Illustrator uses in its own Dimension tool, where Scale sits under Dimension Text and nowhere else.
Tap the scale in the top bar to change it. There are chips for 1:1, 1:2, 1:5, 1:10, 1:20 and 1:50, and you can type any ratio into the box. The panel spells out what the current one means.
Type size and the distance a dimension line sits from a shape are artboard sizes, not real ones. They belong to the drawing. An 8 pt label is 8 pt on the page whatever scale you work at.
The top bar
Five things, left to right.
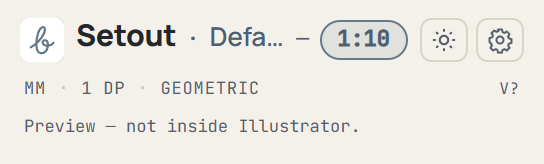
- Setout. The name. Always there.
- The profile name. Which set of saved settings is in use. Press it to open the profile list. It shows only when there is room for it. On a narrow panel it steps aside and the profile is reached through the settings instead. The name and the scale never fight for space.
- The scale. Tap to change.
- Sun or moon. One tap walks light, dark, then follow Illustrator.
- The gear. Settings. It is the only way in.
Underneath sits a quiet line of what is currently set: the unit, the decimal places, the bounds mode, and a Canvas x10 flag on a large canvas document. Below that, the panel tells you what it just did, or why it will not do something. That line wraps rather than cutting off.
Measure
Press Add dims and the sizes land on the drawing.
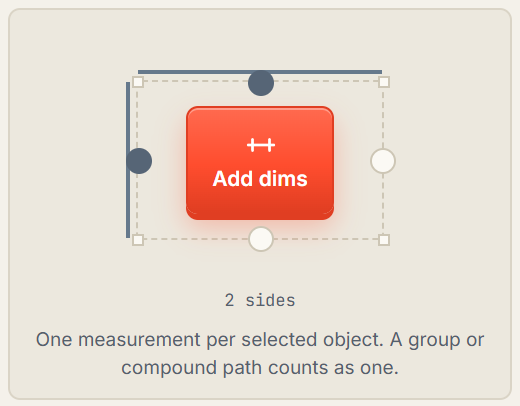
The box in the middle is the picker. Press a circle to say you want a size on that side. Press it again to change your mind. The panel counts what you have picked underneath.
The dimensions are drawn to the same anatomy as Illustrator's own Dimension tool: extension lines at half the weight of the dimension line, the offset and overrun growing with the text size, and parallel dimensions stacking by text height with the shortest nearest the shape. Numbers sit clear of the line and out of the way of the artwork and of each other.
Put on their own layer is on by default. Every label goes on a layer called Dimensions, which keeps them out of the way and makes them easy to hide or remove. Turn it off and the labels sit on the artwork's own layer instead.
Three buttons sit under the picker.
- Re-measure rebuilds every Setout label in the document from the artwork as it is now. Use it after you have resized something.
- Copy puts a table of the selection's sizes and contour lengths on the clipboard, ready to paste into a quote or a spreadsheet.
- Undo labels removes every Setout label in the document in one step. It takes labels from an earlier session with it, so on a drawing you have come back to, be sure. One undo puts them back.
A fresh panel opens with Measure showing and everything else folded, so it fits its window without a scrollbar. Press any section heading to open it. Setout remembers what you leave open.
Also measure
Seven things Setout can add besides width and height. Turn one on, then press Add dims.

| Button | What you get |
|---|---|
| Gaps | The distance between the objects you selected |
| Area | The area of each object |
| Segment | The length of every straight and curved segment |
| Radius | The corner radius of circular arcs |
| Angle | The angle at every corner between straight segments |
| Centre to centre | Midpoint to midpoint, neighbour to neighbour |
| To artboard | The distance to the artboard's left and top edges |
Gaps and centre to centre need at least two objects. With three or more, they measure neighbour to neighbour across the row rather than every possible pair, because that is what reads on a drawing.
How it reads
Seven quick switches for the look of the numbers.

The three worth knowing about:
- Second metric puts a second line on every label in another unit, for a drawing that crosses the Atlantic.
- Extra info adds a summary line under the selection: how many, the total contour, the largest and the smallest.
- Label background puts a solid block behind the number so it stays readable over busy artwork.
Contour length
The length round the outside of what you have selected.
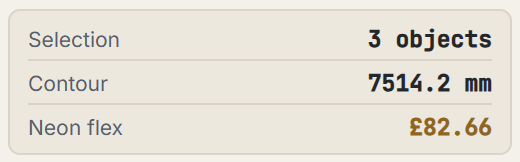
For neon flex, LED strip or trim cap, it is the number that decides the price.
It is always the whole selection. Grouped or not, compound or not, you get one number, not one per shape.
- Select the artwork.
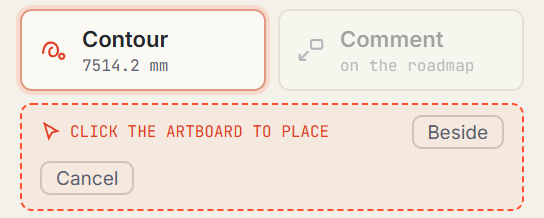
- Press Contour. The length appears on the button straight away, and the button lights up.
- Click the artboard where you want the number. The label lands there.
Beside puts the label just outside the selection instead, ready to drag. Cancel or the Escape key stops.
Three things to know.
- Click on empty canvas. If you click on a shape's outline, Illustrator turns that line into a text box. Setout refuses the click and tells you so. Press Ctrl+Z once and the line comes back.
- It is not instant. A panel cannot see your mouse, so Setout watches for the click. It takes about a sixth of a second.
- Undo takes two presses. The first removes the label. The second clears the empty text box the click made. In between, your cursor is in that box and the panel's buttons go grey, because Illustrator will not let anything else be selected while you are typing. Press Escape and they come back.
To price it, put a rate per metre in the settings. The cost then appears under the length.
Comment
This is on the roadmap and the button is greyed out.
Point at something on the drawing and write a note against it.
It will drop an arrow where you drag one and let you type at the end of it, with its own line and text style so a comment never reads as a measurement.
Transform
It works in document units, not at the scale.
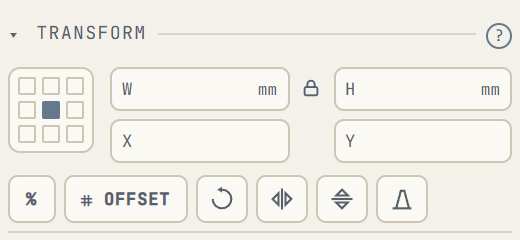
Illustrator's own transform, in the same panel. Type 100 into the width box and the artwork becomes 100 mm on the artboard. The scale changes what a label says, never what a transform does.
Width, height, X and Y. The nine point grid on the left is the reference point, so a change happens about the corner or edge you choose. The padlock keeps the proportions.
X and Y are measured from the top left corner of the active artboard, with Y downwards. That is the same convention as Illustrator's own Transform panel.
Six buttons underneath.
- % resizes by a percentage, with 50, 75, 150 and 200 one press away.
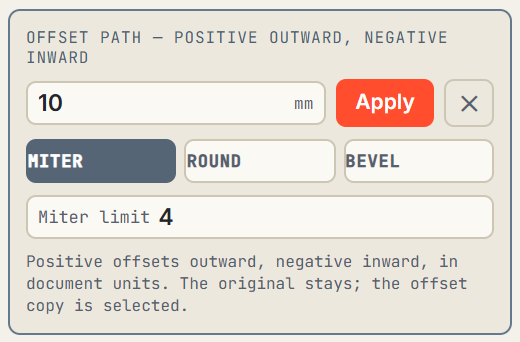
- Offset offsets the path. One value: positive offsets outward, negative inward, in document units. Choose Miter, Round or Bevel, with a miter limit that is live only while Miter is chosen. Your original stays where it is and the offset copy is selected. The geometry is Illustrator's own Offset Path, so the joins are its maths, not ours.
- Rotate turns the selection 90 degrees clockwise.
- Flip horizontal and flip vertical.
- Shear leans the selection by an angle.
There is no preview on Offset, deliberately. Illustrator has no scratch space outside the undo stack, so a preview you cancel still costs two undo steps, every time you change the value. Apply is one step.
Align
Illustrator's own aligning, in the same panel.
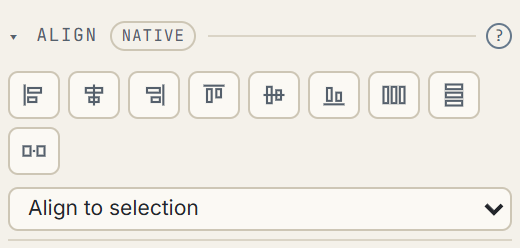
Six aligns, then distribute horizontally and vertically, which need three or more objects.
Set the gap takes a spacing and applies it between the selected objects, in document units.
The dropdown chooses what you are aligning to: the selection, the artboard, or a key object.
Pathfinder
Illustrator's own pathfinder, in the same panel, so that window can stay closed.
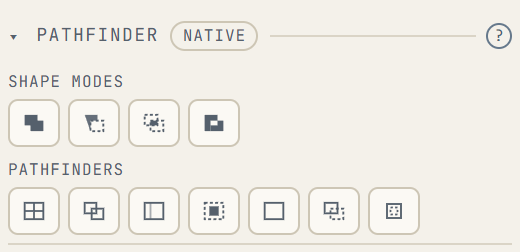
Shape modes: Unite, Minus front, Intersect, Exclude. Minus front is the knockout, which is the one most sign work needs.
Pathfinders: Divide, Trim, Merge, Crop, Outline, Minus back, and make or release a compound path.
These call Illustrator's own commands, so they behave exactly as they always have, and each is a single undo.
Live text
Select live text, press Add dims, and you get the size of the letters rather than the box around them.
Setout outlines a copy you never see, measures that, and throws it away. Your text stays live and editable.
It works on point text and on area text. On area text the difference is large, because the box you dragged is nothing like the letters inside it.
Contour, area, segments and angles still need the text outlined first. Only width and height read the live letters.
Setout will name a problem rather than give you a wrong number. It stops, and says so, for a missing font, for text with a warp while you are in geometric bounds, for an envelope, for text on a path, and for threaded text.
Settings
Everything is behind the gear, written in words, with a question mark beside anything that needs a sentence of explanation.
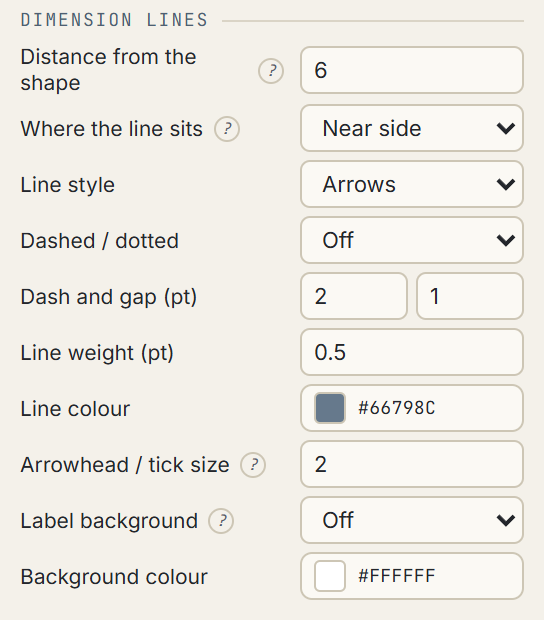
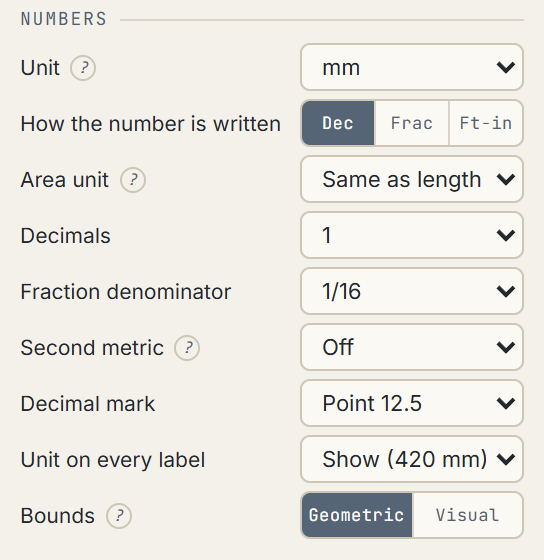
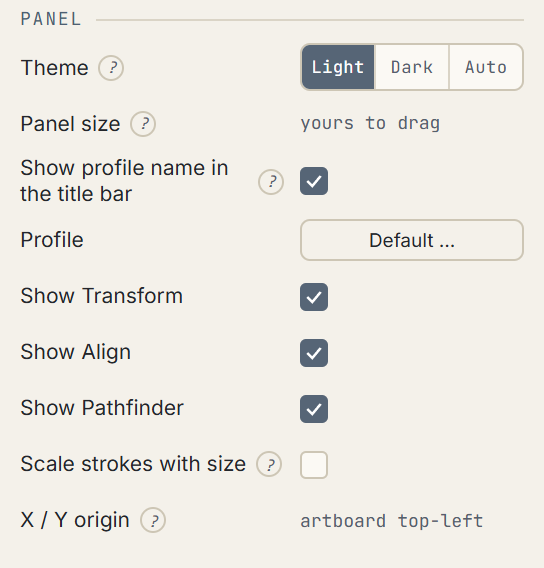
Press a question mark and the sentence opens under the setting, so it is never cut off by the edge of the panel.
One type style is shared by every dimension label. One font, one size, one text colour, one line colour. Comments have their own style, so a note never reads as a measurement.
The groups, in order:
- Dimension lines. How far the line sits from the shape, where it sits, its style, dashes, weight, colour, arrowhead or tick size, and the background block behind the number.
- Numbers. The unit, decimal or fraction or feet and inches, a separate area unit so area can read in square metres while lengths read in millimetres, decimal places, a second metric, the decimal mark, whether the unit is printed on every label, and bounds. Bounds is worth understanding: geometric measures the path itself, visual includes the stroke. On a 10 mm keyline that is a 20 mm difference.
- Type. The font, size, the gap between the number and the line, and the text colour. Two buttons copy the text colour to the line or the line colour to the text.
- Comment style. Its own line, weight, dashes, arrowhead size and which end it sits, font, size and colour.
- Material. A name and a price per metre. Set a price and the contour length is costed for you.
- Panel. Theme, panel size, whether the profile name shows, and switches to hide Transform, Align or Pathfinder if you do not use them.
Colours. Press a swatch and you get three ways to set it: a palette, a box to type a hex code into, and Take from the selection, which reads the colour off whatever is selected in Illustrator. That last one is the quickest on a real job. A CMYK document gets a CMYK colour and an RGB document an RGB one. A spot colour is flattened, and Setout says so rather than pretending.
Profiles
A profile is a whole set up saved under a name: the scale, the unit, the number format, the line and type styles, the material rate, and which sections are hidden.
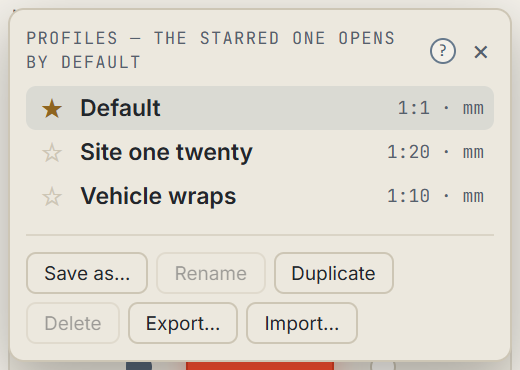
Press the profile name in the top bar to open the list. If the panel is too narrow to show the name, the Profile row in the settings opens the same list.
- Save as keeps the current settings as a new profile.
- Rename, Duplicate and Delete do what they say. Default allows none of them.
- Export writes a profile to a file. Import reads one in. That is how you give the rest of the team your set up.
- The starred profile is the one Setout opens with. One star at a time.
When something does not look right
Every button has gone grey and the panel says "Editing text". Your cursor is in a text box, so Illustrator will not let anything else be selected. Press Escape. This normally happens one undo after placing a contour label.
I clicked to place a contour and a shape turned into a text box. The click landed on the outline. Press Ctrl+Z once and the shape comes back, then press Contour again and click on empty canvas.
Add dims did nothing. Check something is selected, and that you have picked at least one side on the picker.
A label reads ten times the size of the artwork. That is the scale doing its job. The label reports the real sign; the artwork is drawn small. Check the ratio in the top bar.
I typed a width and the artwork did not change by the scale. It is not meant to. Transform works in document units.
The size includes the outline and I did not want it to. Settings, Numbers, Bounds. Geometric measures the path, visual includes the stroke.
My labels have gone. Undo labels removes every Setout label in the document, including ones from an earlier session. One undo brings them back.
The panel will not grow to fit its contents. Illustrator owns the size of a panel and ignores a request to change it. Drag the panel's edge to the size you want, or dock it, and it stays there. The contents scroll.
The profile name is missing from the top bar. The panel is too narrow to show it. Widen it, or use the Profile row in the settings.